 |
; |
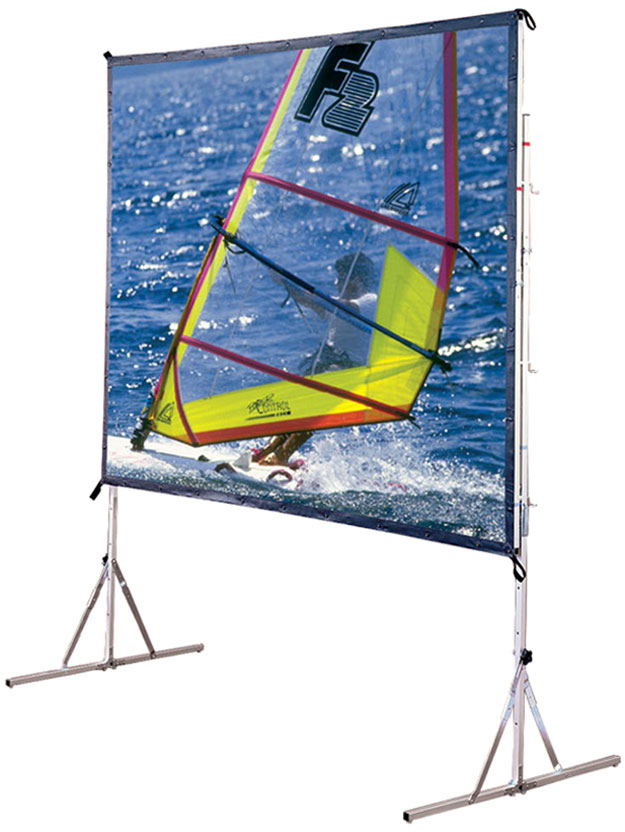
If you’re like me, the thought of having to assemble anything such as a desk, or a bookcase – or anything sold at Ikea, save for the items on their breakfast or lunch menu – shakes me into a rotating state of hot and cold sweats, with intense heart palpitations. Whenever anyone, and I mean anyone, even so much as vaguely offers to help, I give them the job, with the tempting lure of my award-winning guacamole as exchange bait. A more than fair enough reward for their sure-handed services I believe. Anyhow, in short, dear reader, when it comes to self-assembly of any kind, I absolutely and positively dread it. And it was with this very same dread that I sought to conquer my fears – once and for all – now bordering on a most unhealthy phobia. My mission: assemble the Draper High Definition Gray Screen. Measuring in at 56 x 96 inches, the reward was as obvious as sun in the sky: being able to enjoy approximately 106 inches worth of movies, gaming, and sports – until I’m basically blue in the face and stout in the gut. If all of this couch potato-infused goodness wasn’t enough incentive to break me out of my shell, then I was doomed forevermore. Alas though, it was. It most certainly was. 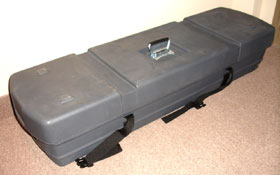
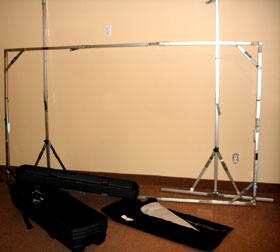
The ultra-handy Draper Projection Screen carrying case
SET-UP: An Assembly In Three Parts (Is It Really This Easy?!)The proceedings began inconspicuously enough: I heroically carried (via a conveniently placed carrying handle) the solid plastic and gray-colored case that contained all of the necessary contents. Once in my designated room of choice, I placed it gently on the floor, strangely ready and raring to get to work. A piece of cake I thought. Then someone politely told me all I’d done so far was bring the case into the room. I laughed it off coyly, trying my best to maintain some semblance of dignity. Then, as I’m often apt to do, I made a mental note to self. I said: self, for a 100-plus inch screen and steel frame, this was relatively light. Did I get the wrong case? Was I simply underestimating my own strength? Was I operating on a juiced-up adrenaline rush? No, no, and no, actually. According to the marketing gurus for Draper, this unit was being billed as one of the lightest projections screens on the market. In fact, fully assembled, it weighs in at less than 60 pounds (27.2 kgs.). And for once, this particular marketing angle was spot on, and not just clever and manipulative advertising as per usual. Now came the time to actually open up the case and begin the assembly. I took an overly melodramatic deep breath that would make any soap opera actor proud and then jumped right in. Part One The first thing I was greeted with was three separate metal fixtures. I took them out and again re-noted just how light they were – but thankfully not at the expense of being flimsy or unstable. They felt strong and sturdy and able. Bravo, Draper! In one of my few moments of sheer genius, I noted well in advance of having read the brief, yet concise instructions attached on the inside of the case, that two of the pieces were to be the left and right stands that would ultimately hold the third, larger piece in place, the actual frame, where finally, the actual screen would attach to. Simple, straightforward stuff. The instructions indeed confirmed all this, and I proceeded to give myself a healthy and overly long pat on the back. And making matters much easier, the stands and frame were color-coated (a festive red and green) so you’d know which ends connected where. Brilliant! The final piece of the four part puzzle was the screen. It was a durable-looking, light-gray screen with black framing around it, protected inside a black, Velcro-attached package. Now this unit indicates that it can be assembled as a one man job. In terms of the assembly simplicity and light-weight nature of it, this is absolutely correct. However, due to the extreme mass and wingspan of the fully-extended frame and stands, it helps to have another person on-call once you’re in the process of actually attaching the frame to the stands. The way I did it was by first extending the stands and the frame, solo, and then locking the hinges and snaps into place where required. This was beyond a breeze, and at it was at this very moment that I could see something positively joyous out of the corner of my eye. The 800 pound gorilla in my living room was starting to exit through the front door, on the verge of tears. If you’ve never seen a grown gorilla cry, let me tell you, try and keep it that way. It ain’t a pretty sight. Although, as they say, the only thing worse than a crying gorilla is an angry one. At any rate, the gorilla’s sadness and vulnerability made me strangely happy and stronger. My real bad case of assembly-itis was now beginning to dissipate. Meanwhile…
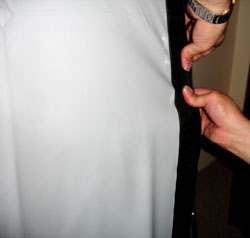
Part Two The next part was attaching the screen to the frame. You can choose to do this after you’ve attached the frame to the stands, but I find it’s a whole lot easier – and probably far more logical – to do the reverse. You can certainly do it by yourself, but I decided to summon some assistance to help expedite the process. After all, I had movies that needed watching and games that needed playing. Again, this was simple to the point of being idiot-proof. If you can button up your jacket or shirt, you can do this. The screen has round, outer button clips that correspond to the round, button connections on the frame. The corners can be a bit testy to button (the screen needs to be as tight as a drum when attaching to the frame for maximum viewing pleasure, and because of this, offers very little slack), but if you work your way from the middle out, I find the process to be far more smoother. So far, so good.
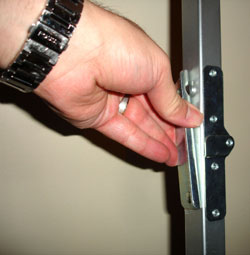
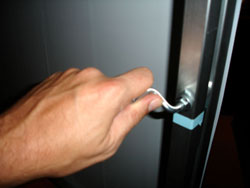
Part Three I was now at the final stage where I needed to attach the fully extended frame to the fully extended stands. With said assistance in tow, we proceeded to attach everything, without so much as breaking a sweat. It comes with six “handy cranks” that attach everything into place. And as the name suggests, they are, indeed, handy cranks that turn easily into place and secure the frame to the stands, all snug and comfy. The frame height is fully adjustable, with a variety of different setting options to achieve the perfect viewing height. Ideally, you want the area just above the center height of your screen to be flush with your eye level. This eliminates having to strain your neck too far up when viewing the top portion of the screen. I can’t stress enough how absolutely crucial this one little adjustment is. And for those of you with a penchant for arriving late to a sold-out movie, you know just what I’m talking about.
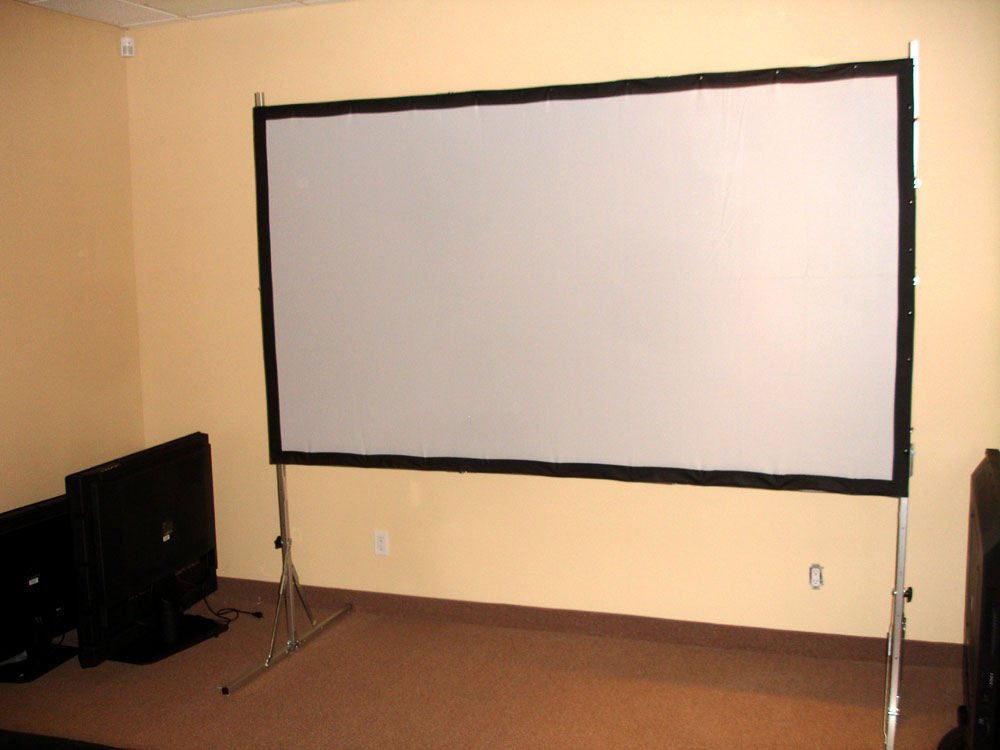
With everything complete and in its proper place, I stood back and marveled at my handy work. I even managed to smile bright, white, and wide – sort of how I’d imagine Marlon Brando would have at an all-you-can-eat Asian buffet during the filming of Apocalypse Now. While I noticed that the black inner framing around the screen was a little crooked, as opposed to being a nice, straight line (Draper says there will be a fix available for this), I also noticed that the total assembly time was about 12 minutes or so, and that made me feel a whole lot better. Now came time to see what this screen could do.
PERFORMANCEUsing a Sony PS3 for HD movie playback, I was connected through HDMI, using BenQ’s W5000 projector and BBC’s Planet Earth as the test subject, naturally. Needless to say, I felt like I was at a movie theatre. The room was dark (as it should be), and I felt completely enveloped and connected with all the on-screen action. Whether it was left or right, or up and down, all my eyes could see was the images unfolding on the screen. If that wasn’t enough, here’s another great bonus that this screen offers: improved picture clarity and quality via its magical ability to increase contrast ratio. That’s right; it can actually increase your contrast ratio! Separate tests indicated that Draper’s heroic screen fabric was able to boost image contrast ratio by about 25 percent. That is a significant selling point to any one who appreciates and demands nothing but the absolute best viewing experience from their home theater. FINAL THOUGHTSDraper’s High Definition Gray Screen is good. Check that, it’s really good. Lightweight (as far as portable projection screens go), an absolute breeze to assemble (did I mention it’s an absolute breeze to assemble?), and a richly engrossing home-viewing experience that actually puts its money where its mouth is by boosting image contrast ratio by roughly 25 percent. Bottom line: if you’re looking to enhance your home theatre experience ten-fold, stop reading this – just go out and get this high definition screen right now. I mean it. Go. Now. You can thank me later.
Highly Recommended
Video Projector Reviews
|
JVC DLA-X30 Review |
|||||||||||||||||||
|
Home • Projector Brands • Video Projector Reviews • Projector Resources • Contact Us
|