Jump To:

Go Back Print Page

Studio Experience Matte White Screen By Boxlight
92-Inch Large Flat Permanent Cinema Projection
White Screen Review & Buying Guide

By Anthony Marsh – October 22, 2008

Manufacturer: www.boxlight.com

Studio Experience 92-Inch Matte White Permanent Cinema Projection Screen


Verdict
: HIGHLY RECOMMENDED
The Studio Experience White Screen by Boxlight is the sure-fire way to punch up your dull images and bring them to life. Offering a 1.0 screen gain, Veltex frame finish, consumer-friendly pricing, tight-as-a-drum, wrinkle-free screen surface, and an easy-as-snap assembly, Boxlight scores large with their fixed projection screen that delivers a top-shelf, home theater experience.


AT A GLANCE
Overview / Packaging & Appearance / Set-Up & Assembly / Performance / Final Thoughts


Overview

Highlights:

  • 92-inch matte white projection widescreen
  • 1.0 screen gain enhances image brightness
  • Via sliding fixing lugs and tensions bars, you’ll have a tight, wrinkle-free screen surface to project on right away
  • Lightweight and easy assembly make it the ideal projection screen for home, school, or business
  • Black Veltex framing absorbs almost all light and blends into the background perfectly, creating the ideal home theater environment
  • Unbeatable price-point and value for your dollar

MSRP:          $799.99 (USD)
Street Price:  $599.99 (USD)

From Boxlight comes their Studio Experience line of projection screens, including the 92-inch, matte white, Permanent Cinema Screen. For the budget-conscious consumer who wants something that's easy to assemble and delivers top-notch performance, Studio Experience has thrown down the gauntlet and delivered the goods.

Packaging & Appearance

Studio Experience 92-Inch Permanent Cinema Projection Screen Complete Packaging
Studio Experience 92-Inch Permanent Cinema Projection Screen Individual Packaging

Just prior to preparing to set up the Studio Experience screen, I was struck by just how simple and lightweight the packaging was. Three separate boxes were kept together via three rounded cardboard fasteners, and within the three boxes, one contained the screen with a separate box within for various items such as screws, fixing lugs, and L brackets, the second box contained the upper and lower aluminum frame tubes, while the third one, surprise, surprise, contained the left and right aluminum frame tubes. All the boxes were clearly labeled so you knew exactly what you were opening, and a brief but easy-to-follow instruction guide was also included. Not counting items such as screws, fixing lugs, or L brackets, there were five major pieces involved with the Studio Experience screen. Four were comprised of the upper, lower and side frames, and the fifth was the actual screen itself. If you’re like me, less is always more when it comes to assembling anything, and in this particular case, Boxlight did a great job keeping everything simple and straightforward.

Studio Experience 92-Inch Permanent Cinema White Projection Screen And Veltex Finished Frame

The actual frames are made of sturdy, yet incredibly lightweight aluminum material, and a really nice touch is the frame finishing, which, as opposed to offering just a bland and boring aluminum finish, comes in a Veltex material. For those unfamiliar with it, Veltex is not unlike felt in look and touch, but as you’ll read further down, it also offers much in the way of elevating the screen’s performance. The upper and lower frame bezels measure a modest 2.5 inches, while the side frame bezels also measure in at 2.5 inches. These are the small, nice, and inconsequential numbers you need so as not to detract from the screen. Speaking of which, the screen itself is a matte white finish, and offers tremendous flexibility when the time comes to pulling things together for a tight, wrinkle-free screen surface. Side to side, the screen measures 80 inches, while top to bottom, the screen measures in at 45 inches, giving you your grand total of 92 horizontal inches of viewing pleasure. Let’s now get into the actual assembly itself.

Set-Up & Assembly

For those of you out there who simply prefer only the company of yourself, this 92-inch Studio Experience screen is just what the doctor ordered. While some assemblies can require a team of people to help, for the most part, with this screen from Studio Experience, you can go it alone. The first part of the assembly is getting the frame together. Care of the fixing lugs which correspond with various arrow markers on the back of the frames, you need to first slide them on the frame rail. The fixing lugs will ultimately be used to fasten the screen to the frame, and while the marked frame arrows are only approximate, they give you a general idea as to where everything will eventually connect. You then have the option to attach the upper mounting brackets solo, or with the bottom ones as well for added security. Considering how light this screen is, I can’t really imagine a scenario where you’d need to add the lower ones. Next up is affixing the L brackets to the four corners where the upper/lower and left/right frames meet.

Studio Experience 92-Inch Permanent Cinema Projection Screen Fixing Lugs And Frame
Studio Experience 92-Inch Permanent Cinema Projection Screen L Bracket Studio Experience 92-Inch Permanent Cinema Projection Screen L Bracket Assembly

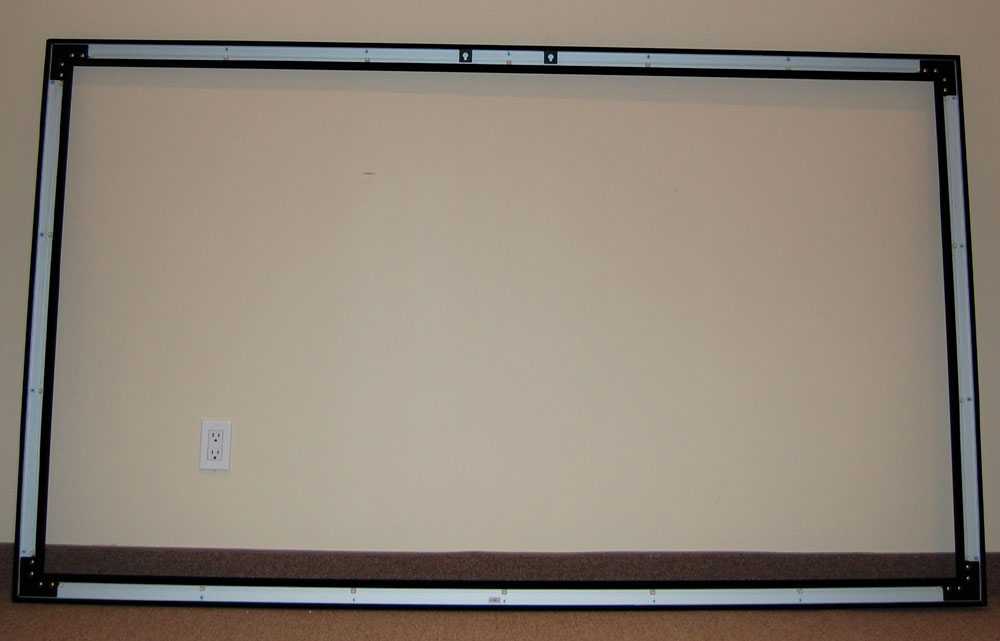
All of this literally takes around 10 minutes, and you’re almost halfway through the entire assembly process, having already put the frame together.

Studio Experience 92-Inch Permanent Cinema Projection Screen Assembled Frame

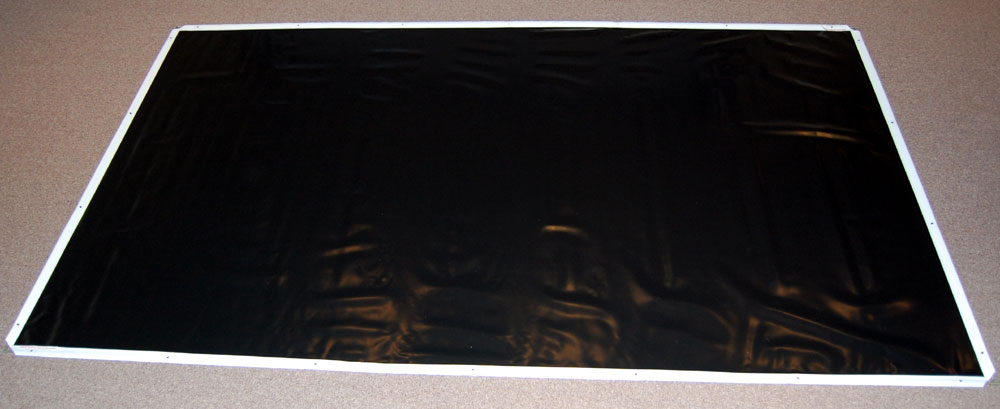
At this point you move on to taking care of the second part of the assembly: the screen, whereby step one entails rolling it out onto a clean and smooth flat surface, and inserting the two vertical and horizontal rods (a.k.a., tensions bars) into the provided slits that line the outer edges of the screen. And because the rods are made of solid metal, they offer no resistance or flimsiness, and can thus be inserted effortlessly. Once you’ve done this, daylight is just ahead, as you’ve now completed the screen assembly.

Studio Experience 92-Inch Permanent Cinema Projection Screen Laid Out Studio Experience 92-Inch Permanent Cinema Projection Screen Tension Rod Insertion

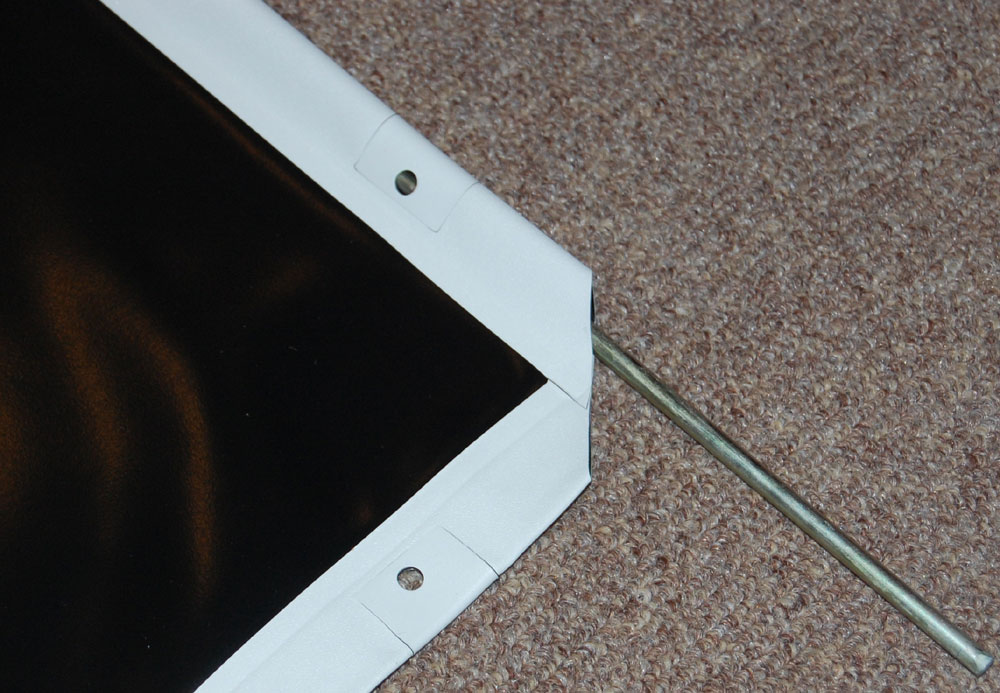
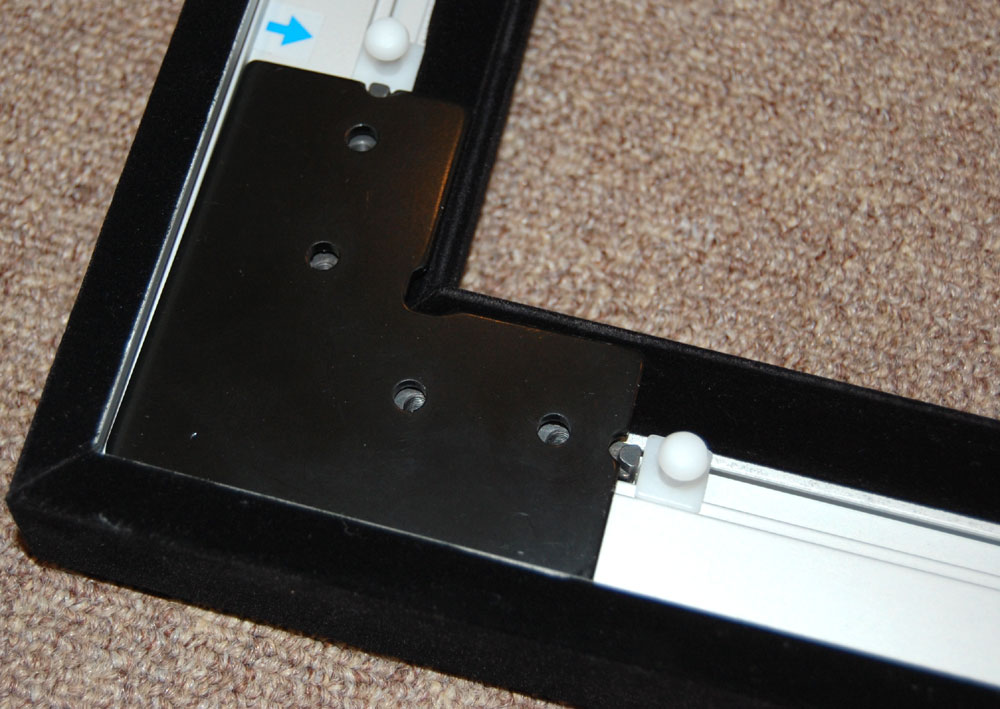
The third step of the assembly is introducing the screen and frame to each other by attaching them. Once you’ve placed the screen over the frame (preferably with both lying flat on the floor), you then need to simply connect the dots by inserting the rounded screen openings overtop of the fixing lugs that are placed throughout the frame. What’s nice here is that Studio Experience realizes that nothing in life is perfect, and because the lugs can slide wherever you wish on the frame rails, if things don’t line up accordingly right off the hop (and they never do), you can slide things into place so that they do. I was able to attach most of the screen to the frame, save for the last three fixing lugs which required an extra set of hands (and strength) to help pull the screen over them securely.

Studio Experience 92-Inch Permanent Cinema Projection Screen Frame To Screen Attachment

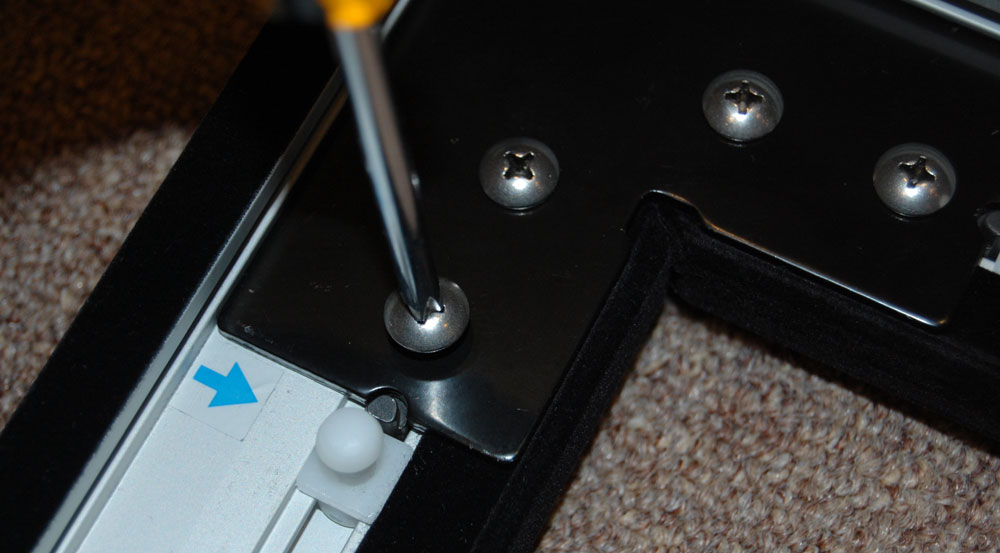
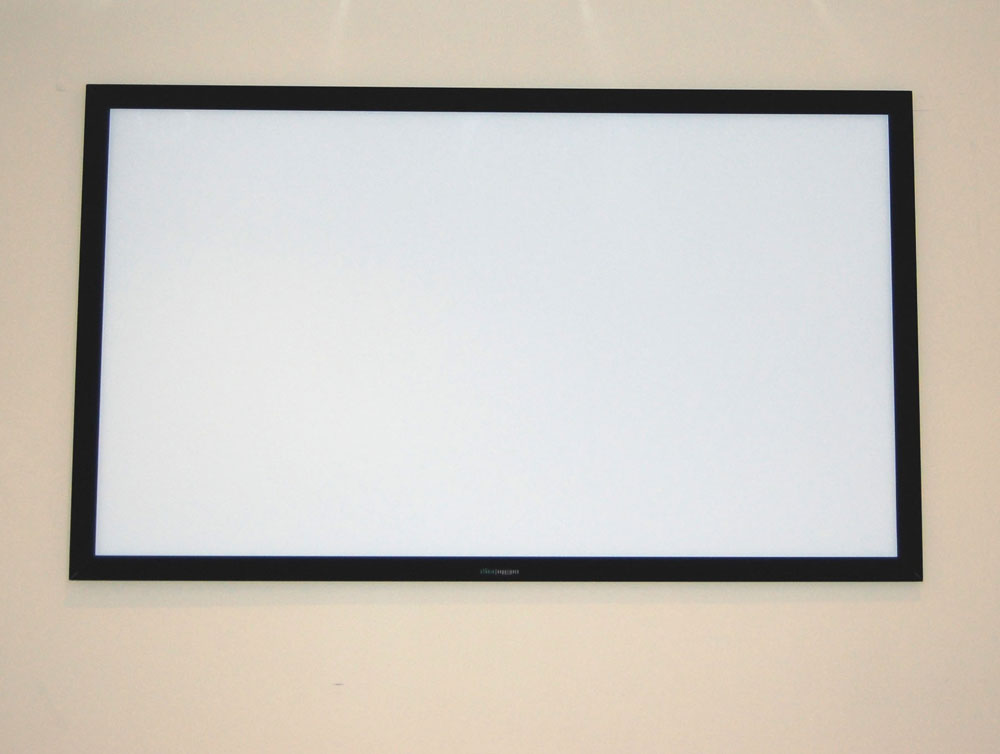
The fourth and final step is mounting the screen to your wall, and because this screen is so lightweight and portable, you don’t have to worry about taking a wall down in the process. Whether you’re mounting to a wall with studs, or drywall minus studs, the instruction guide outlines what screws and/or anchors to use. While some screens require 24 hours to settle into a nice and tight, wrinkle-free finish, due to the way the Studio Experience screen has been designed, care of the fixing lugs and tensions bars, as soon as the assembly was complete, the screen was tight and right and ready to go, which, oddly enough, segues quite nicely into our next section regarding the screen's performance.

Studio Experience 92-Inch Permanent Cinema Projection Screen Wall Mounted

Performance

With a total assembly time that set me back only 45 minutes or so, I was feeling good and refreshed and ready to see what the 92-inch Studio Experience Cinema Screen had to offer. Connected via an HDMI cable between the Epson 1080 projector and a Sony PS3 for HD, 1080p output, the Blu-ray movie on tap was Pirates of the Caribbean: The Curse of the Black Pearl.

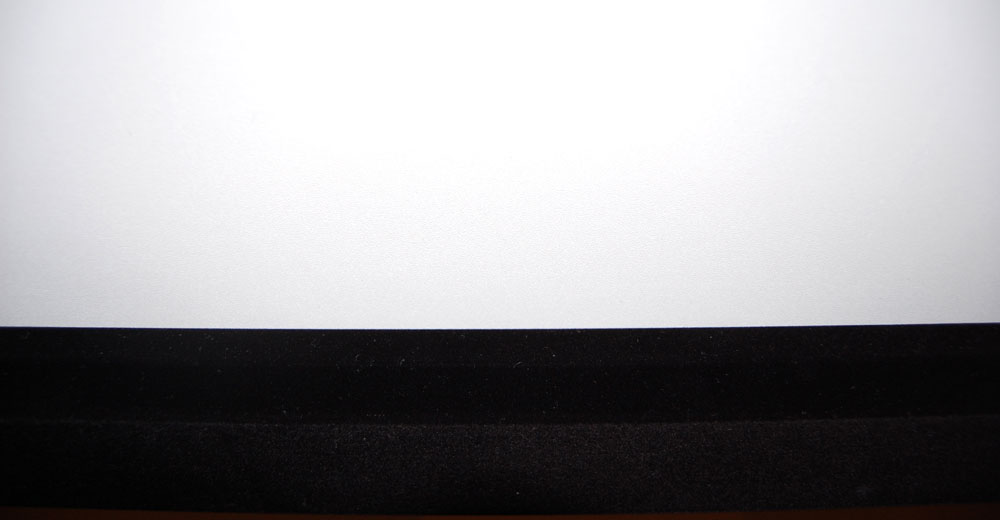
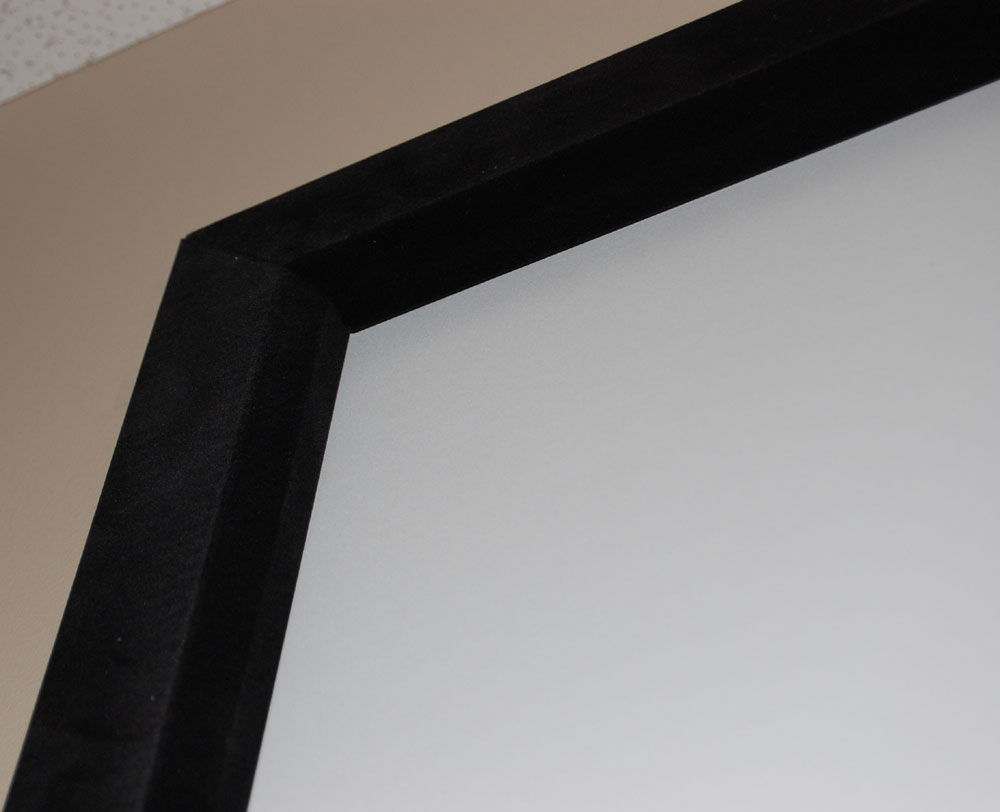
As I’d mentioned earlier, the projection screen frame is finished in Veltex. Aside from offering appealing aesthetic value, it also does much to enhance your home theater ambiance by almost completely absorbing any and all light that hits it. So, if you’re having a bad day, or just don’t have the time to properly get your image shooting within the prescribed dimensions of the screen, it cuts you some much welcome slack. Another great benefit of this material is the way in which it blends wholly into the blackness of the background, thereby creating the absolute perfect home theater atmosphere where the only visible light you see is from the images on the screen.   

Studio Experience 92-Inch White Permanent Cinema Projection Screen Pirates Of The Caribbean Johnny Depp Image
Studio Experience 92-Inch White Permanent Cinema Projection Screen Pirates Of The Caribbean Orlando Bloom Image
Images taken using a Nikon D40 with the Epson 1080 projector.

Studio Experience 92-Inch White Permanent Cinema Projection Screen Pirates Of The Caribbean Ship Image
Image taken using a Nikon D40 with the Epson 1080 projector.

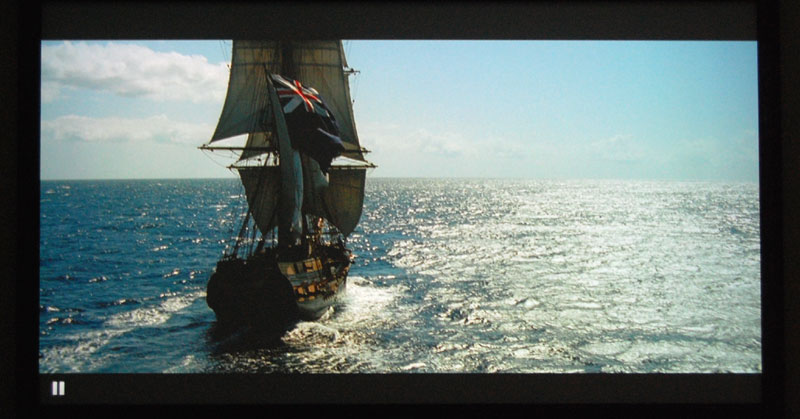
Now normally, when it comes to screens used mainly for entertainment purposes, I tend to prefer the ones that come in a gray-colored screen surface. By their very nature, they’re more conducive to projecting a superior image in terms of contrast and darker, light-level details. With the Studio Experience 92-inch Permanent Cinema Screen from Boxlight, the screen’s color surface is the more traditional matte white, and I wasn’t quite sure how good it would perform. For those of you who’ve seen Pirates of the Caribbean: The Curse of the Black Pearl, you already know how de-saturated and smoky the cinematography and colors in the movie are. On the surface, this pairing had the potential to be a more toxic mix than a musical duet between Yanni and Jessica Simpson, but to my surprise and amazement, all the images came across looking nothing less than impressive. Detail and contrast in even some of the darkest of dark segments of the film were above average, looking as good as some of the more expensive HD gray screens I’ve used, and the occasional flurries of sunshine-infused brightness looked even better – an area where matte white screens tend to excel. And memo for all of you sports fanatics and armchair quarterbacks: this is also applicable to enjoying the big game in bright, vivid, HD-goodness.

Studio Experience 92-Inch Permanent Cinema White Projection Screen Frame Bezel And Veltex

Final Thoughts

With an attractive price-point, and performance quality well above that, the 92-inch Studio Experience Permanent Cinema Screen from Boxlight is the perfect choice for home, school, or business. Combine all of that with ease of use and set-up, and you’ve got yourself an absolute no-brainer when it comes to buying a projection screen and enjoying everything on a larger-than-life canvas.


Verdict recommendations are ranked from best to worst as follows:

Highly Recommended                      
Recommended                                  
Moderate Recommendation            
Take A Pass
Avoid Like The Plague 


Video Projector Reviews

JVC DLA-X30 Review
Boxlight Pro7501dp
Panasonic PT-AE4000U
Mitsubishi HC4000 Review
JVC DLA-HD250 Review
HC3800 vs 8100
JVC DLA-HD550
Boxlight Projectowrite2
Epson 8100 Review
Epson 8500UB
Boxlight MP65E

More Projector Reviews